Instead of bloating experienced users with predefined Code Blocks, we already have the Export/Import feature. We decided to make it on JSON export. Everyone who needs to study code examples can import them and not be bothered after each new installation.
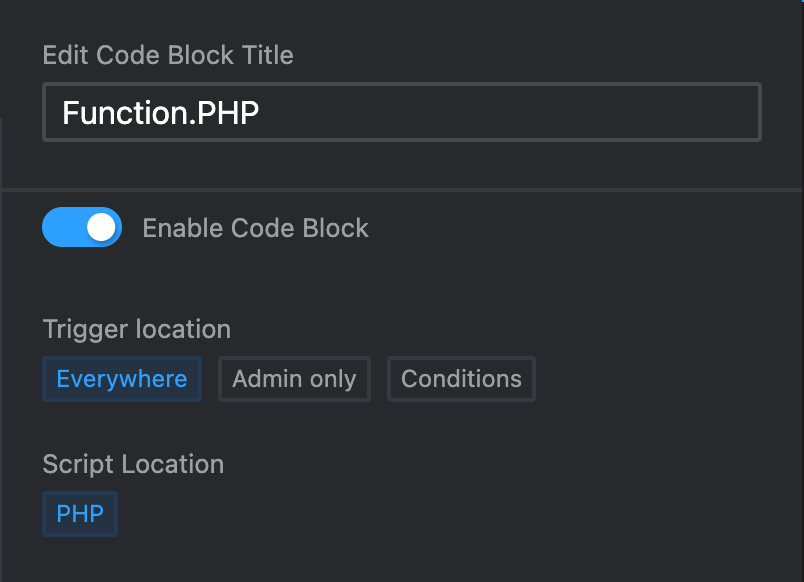
Trigger location: Everywhere
This will trigger before everything. Equivalent to this is INIT or Function.php
<?php

// ************************************************************ //
// Use this as an alternative to function.php
// Bellow is an example of how to add a custom body class
// ************************************************************ //


// Add specific CSS class by the filter.

add_filter( 'body_class', function( $classes ) {
	return array_merge( $classes, array( 'your-class-name' ) );
} );

?>
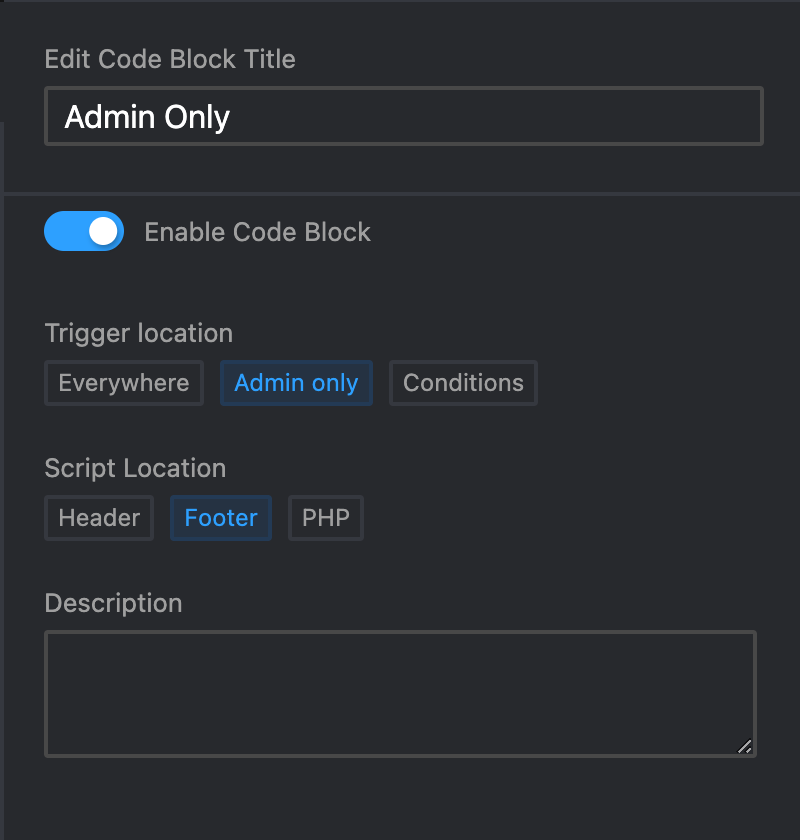
Trigger location: Admin only
It will affect only the WordPress admin panel and not the website when you are logged in. It’s perfect if you want to create a custom admin panel or highlight some menu inside the admin panel.
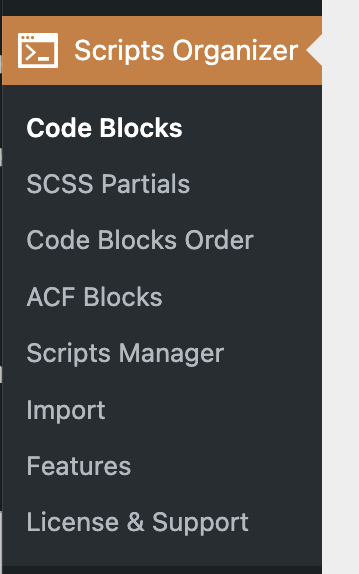
a.wp-has-submenu.wp-has-current-submenu.wp-menu-open.menu-top.toplevel_page_scorg-license.menu-top-first {
    background: #cb8c51 !important;
}
Trigger location: Header, Footer, PHP
Once you have chosen where on the website scripts will be triggered, you need to decide where on the page they should be injected. The “Header” and the “Footer” have options to predefine Code Languages:
- CSS
- SCSS
- JavaScript
- HTML
CSS
.card { your code }
.card .title { your code }
SCSS
Is perfect for writing code with less repetition. Also, it’s much easier to organize it.
.card {
    your code

    .card .title { your code }

}
JavaScript
(function($){

    $(function() {

	// Code goes here

    });

})(jQuery);
HTML
If you are using HTML, you need to wrap it and . You can not write SCSS inside an HTML element.
A perfect Example for HTML is to paste Google Analytics Code
<style>
    .card { your code }
    .card .title { your code }
</style>

<script>
    (function($){

        $(function() {

        // Code goes here

        });

    })(jQuery);
</script>

<!-- Global Site Tag (gtag.js) - Google Analytics -->
<script sync src="https://www.googletagmanager.com/gtag/js?id=GA_TRACKING_ID"></script>
<script>
    window.dataLayer = window. dataLayer 11 [];
    function gtag() {dataLayer .push (arguments); }
    gtag('js', new Date () );
    gtag('config', 'GA_TRACKING_ID');
</script>
<!-- End of Global Site Tag (gtag.js) - Google Analytics -->
Script location: Conditions
This will trigger scripts on the front end and inside the editor. For Example, you can use this for CSS/SCSS, JS, and PHP for Theme. By default, if you don’t use options Bellow, it will effect every page, post, post-type, and archive.
:root{
    --color-bg: #d0e6ee;
    --color-text: #1f1f1f;
    --color-action: rgb(0, 17, 255);
}

a{
    font-family: var(--color-action);
}

.active{
    background-color: greenyellow;
}
// Example on how to toggle class and to make a menu
// HTML Markdown
// <div class="toggleTrigger">Menu Toggle</div>
// <div class="toggle">Toggle</div>
var toggleTrigger = document.querySelector('.toggleTrigger');
var toggle = document.querySelector('.toggle');
toggleTrigger.onclick = function() {
toggle.classList.toggle('active');
}
<?php

// Add Google Tag code which is supposed to be placed after opening body tag.
add_action( 'wp_body_open', 'wpdoc_add_custom_body_open_code' );

function wpdoc_add_custom_body_open_code() {
    echo '<!-- Google Tag Manager (noscript) --><noscript><iframe src="https://www.googletagmanager.com/ns.html?id=GTM-J4LMVLR" height="0" width="0" style="display:none;visibility:hidden"></iframe></noscript><!-- End Google Tag Manager (noscript) -->';
}

?>
Template: Page/Post
This option will help you target a specific page, post, custom post.
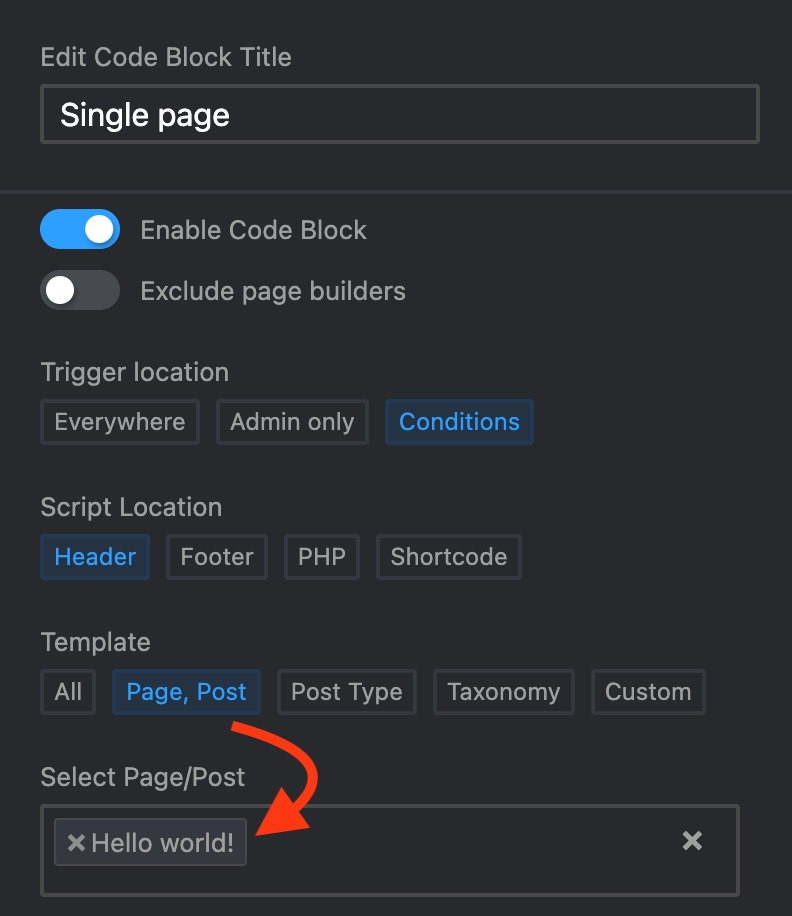
/* "Hello world" - blog post will have black background with yellow text. */

body{
    background-color: black;
    color: yellow;
}
Template: Post Type
This option will help you target a specific post type.
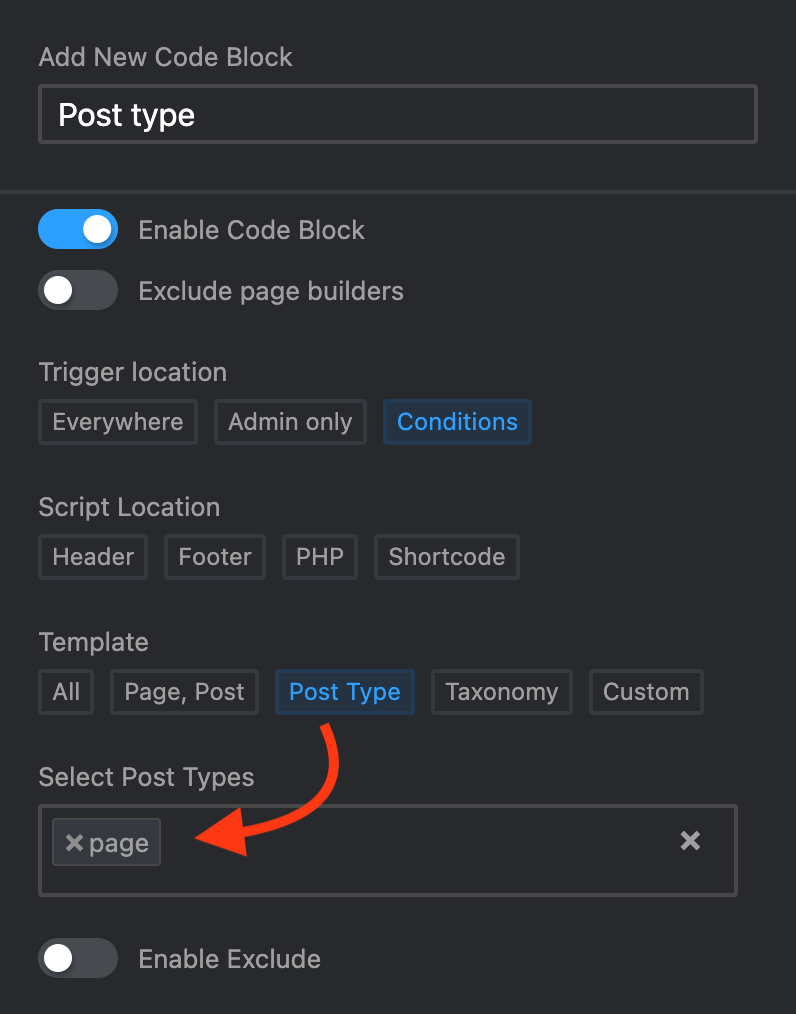
/* All posts will have blue background with yellow text. */

body{
    background-color: blue;
    color: yellow;
}
Template: Taxonomy
This option will help you target a specific taxonomy.
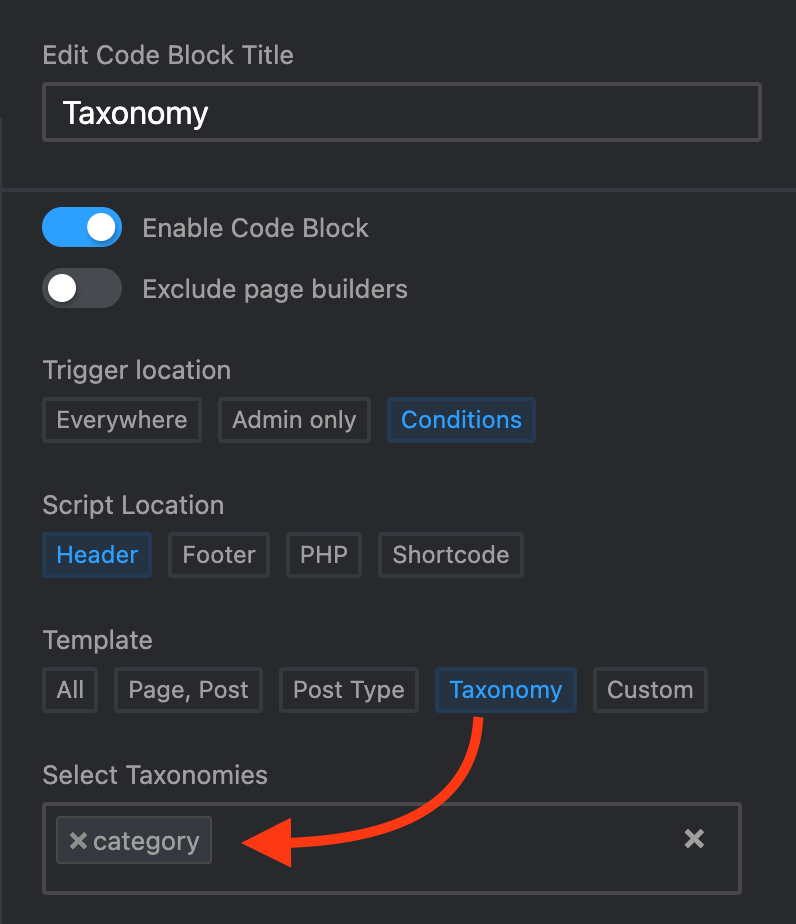
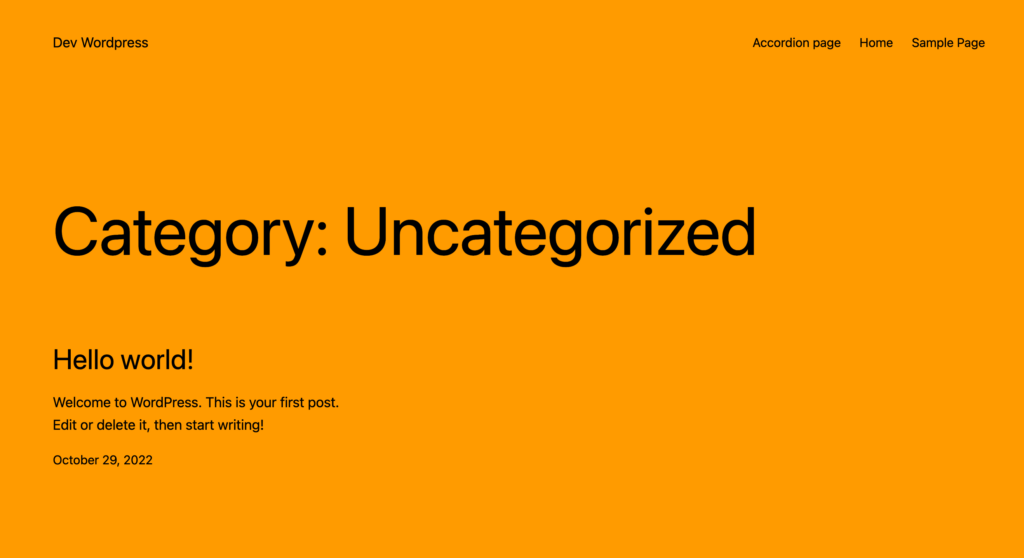
/* All posts will have blue background with yellow text. */

body{
    background-color: blue;
    color: yellow;
}
Template: Custom
This is the most powerful one. You can use WordPress conditions or create your own.
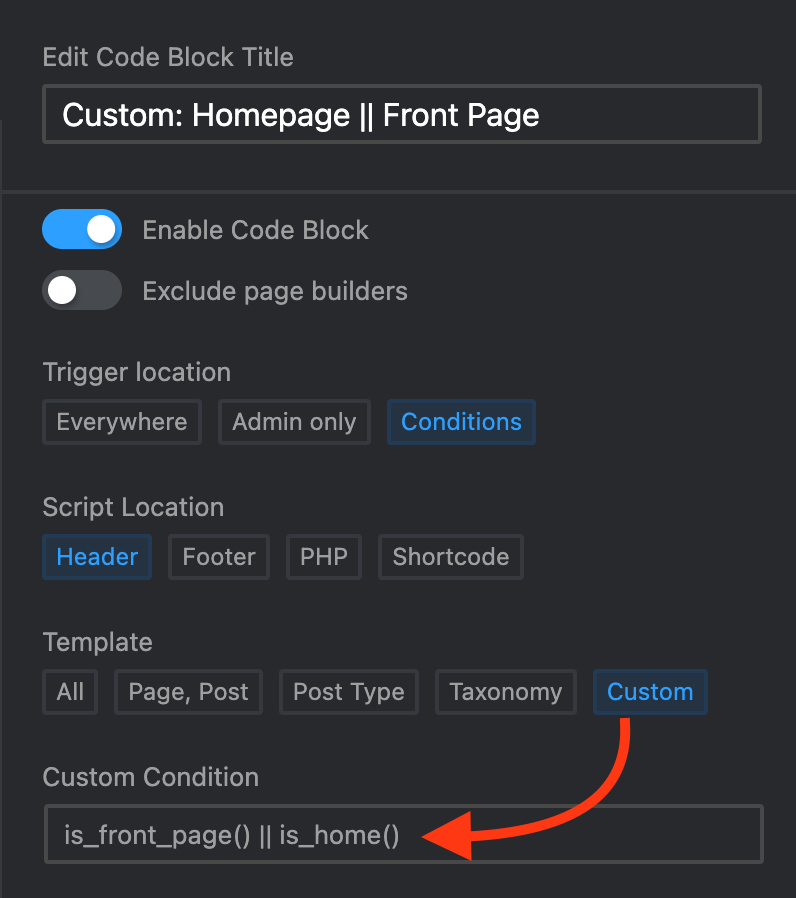
/* Applies CSS on Homepage and Front page */

body{
    background-color: green;
    color: pink;
}You can use PHP operators as well.
Here is the list of the most used ones to help you combine them:
! = NOT
!is_home() = IS NOT Homepage
&& = AND
is_front_page() && is_user_logged_in() = IS Frontpage and IS User logged in // Means both conditions should meet in order to run the code
|| = OR
is_front_page() || is_home() = IS Frontpage OR IS Homepage // Means if either of the conditions meet then run code
Or you can create YOUR OWN CONDITION.
Paste Custom Condition Code inside Functions.PHP Code block
<?php

// Custom Condition

function check_if_url_has_string( $string_to_find ){
    $curr_url = $_SERVER['REQUEST_URI'];
    if(strpos($curr_url, $string_to_find) !== false){
        return true;
    } else {
        return false;
    }
}

?>
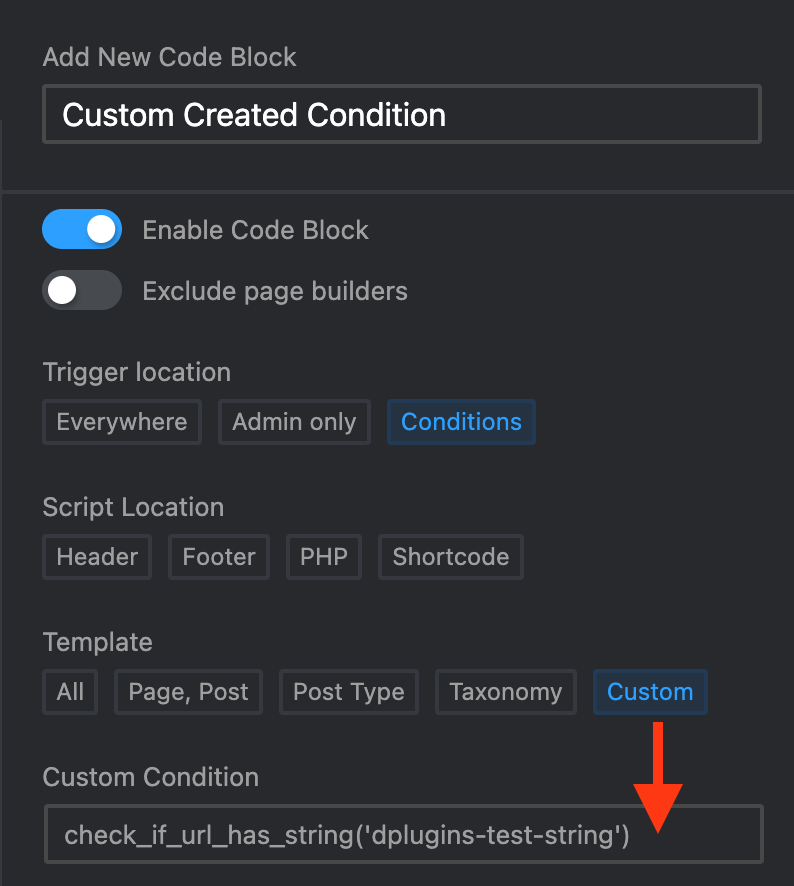
Then reuse this condition in code blocks by pasting “check_if_url_has_string(‘dplugins-test-string’)” under Custom.
Exclude
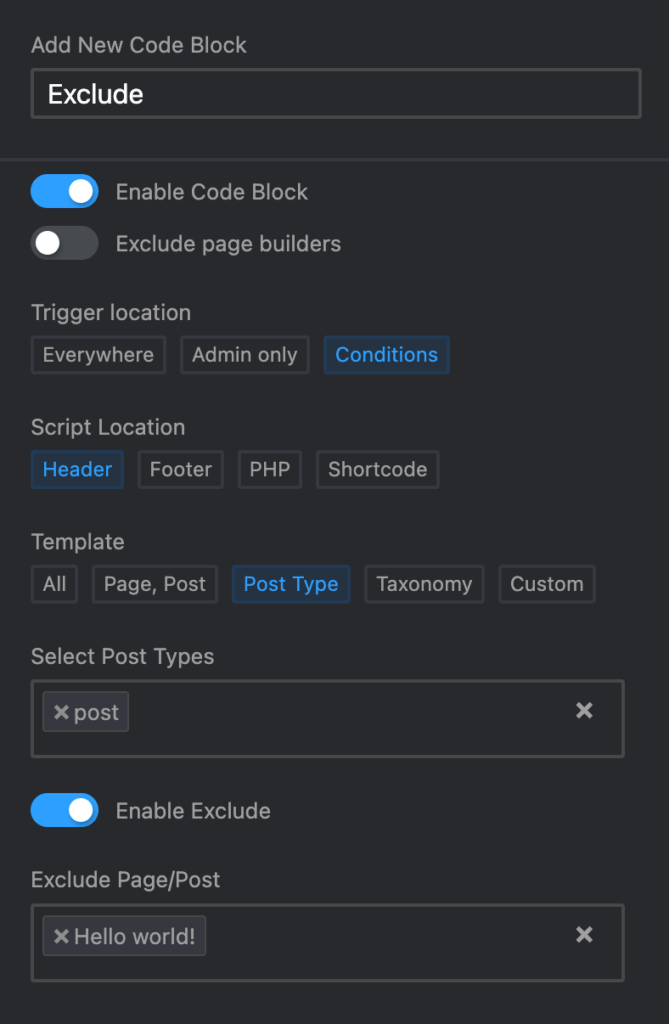
This will help you to have a combination with the triggered above.
This will allow you to use: Conditions – Header – CSS to apply CSS everywhere on the website
– except for some specific post type, taxonomy, or targeting of a single page or post.
Or you can use: Conditions – Header – CSS, And apply only to post type Post, and it will apply to all posts
– except for some specific post, “Hello World.”
Leave a Reply